
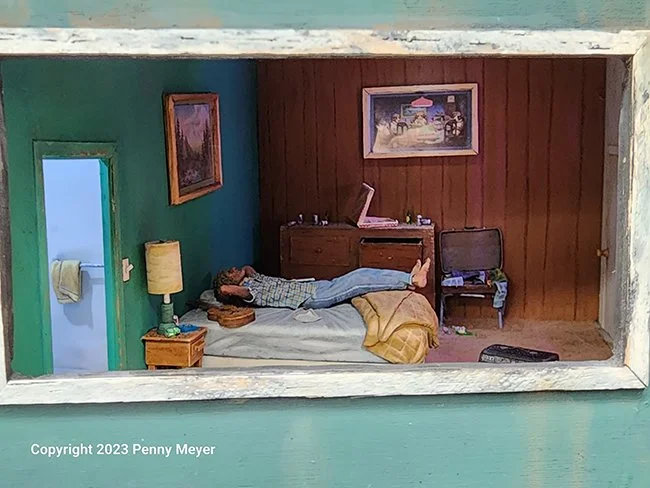
Pete’s depiction of the lonely life of a touring indie-rock musician was inspired by the Replacements’ song “Can’t Hardly Wait” (“Lights that flash in the evening/Through a crack in the drapes”), which gives the box its title. This site’s co-editor Barry Biediger helped with the lighting effect of headlights speeding by outside the window at right. It’s a hard box to photograph, although Penny Meyer did her best, and it’s much more effective in person.


Pete wrote the following article for the MFCA newsletter The Guidon and kindly allowed us to reprint it here.
Can’t Hardly Wait
By Pete Culos
They were a hard partying, self-destructive, shambolic mess. They didn’t have a high-school diploma or a driver’s license in the entire band. Rock ’n’ roll was their only option and somehow, these lovable losers made some of the greatest music of the ’80’s.
I am talking, of course, about my favorite band: The Replacements. Never heard of them? Neither have most folks. If you know, you know.
Anyway, one of their most iconic songs, “Can’t Hardly Wait,” is a song about the loneliness of being a musician on the road. The line, “lights that flash in the evening, through a crack in the drapes” always evoked a vivid image of a dingy motel room with the flash of car headlights creeping across the walls. It’s the perfect subject for a box diorama, right?
Well, conventional wisdom from the late, great, box diorama artist, Sheperd Paine held that moving lights would only draw attention to the fact that nothing else in the diorama is moving. Good point. But, what if nothing else in the diorama is supposed to be moving? The lone figure is just lying there on the bed feeling lonely. Early cardboard mockups convinced me that it could work.
I started the build-out of the room and the sculpting of the figure and bed long before I figured out how to pull off the moving light effect. After considering every conceivable mechanical solution over the course of a couple of months I stumbled upon an idea courtesy of the Cosplay community. They use individually addressable LEDs for all kinds of stunning lighting effects! Problem solved!
Not quite. The effects are produced by microcontrollers, such as an Arduino, and coding. Coding? I just barely learned how to solder and now I’m programming a microcontroller? How the hell am I going to learn to code in time to get this diorama to the MFCA show? The answer is that I didn’t. Not really, anyway. Hours of YouTube videos helped me to understand some things but there was no way I could do it from scratch.
As it turns out, I didn’t have to. I had two great resources. There are open-source libraries of effects for LEDs including Arduino and FastLED (which is what I used). I also had MFCA Grand Master Barry Biediger. Barry got me started with the effect then sent me the code and explained which variables I could tweak to zero in the effect I wanted. He also gave me a wiring diagram that saved me months of trial and error. (I still effed it up once anyway!)
After uploading the code to the Arduino which was wired to the LED strip, I found that the effect didn’t scale well to the scene because the LEDs were spaced too far apart. So, I got the densest LED strip I could find and adjusted the number of LEDs in the effect and, presto! My vision was now a reality!
No project is complete without some lessons learned. First, don’t be afraid of microcontrollers like Arduino. I’m not going to say they’re easy to use but they aren’t as hard as you think. With the vast libraries available and a little knowledge of how to identify the variables, you have a lot of options. Second, be certain that your scene actually benefits from a moving light effect. Heed Shep’s advice if your scene calls for action. Finally, if you are going to use LEDs that don’t have pre-wired resistors, then learn a little bit about how resistors work. I rewired an entire circuit because an LED wouldn’t light. It turned out the resistor was too big and soaked up so much power it didn’t look lit.
One last thought is to consider the outside of your box. I was afraid my scale room would be mistaken for an apartment, so I made sure the exterior box looks like a motel. Just don’t overdo it.
Now it’s time to crank up some ’80’s Alt tunes and start thinking about the next project!

First Mock up – Checking viewing angles with main scratchbuilt room furniture.
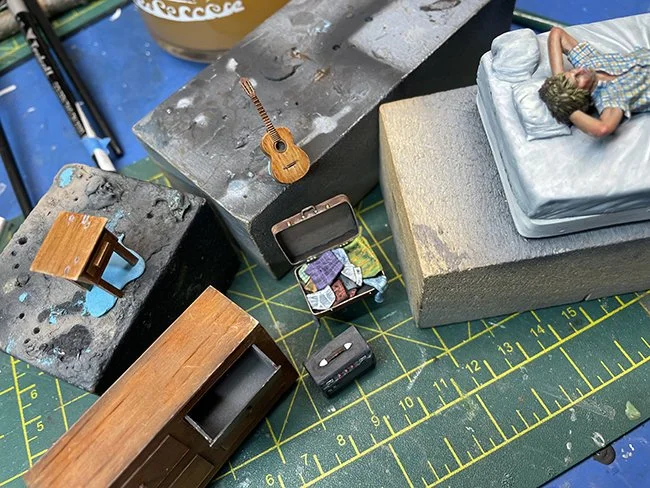
Room Contents in progress – Scratch built furniture and figure in the painting phase. The guitar is from the MiniArt musical instruments set.
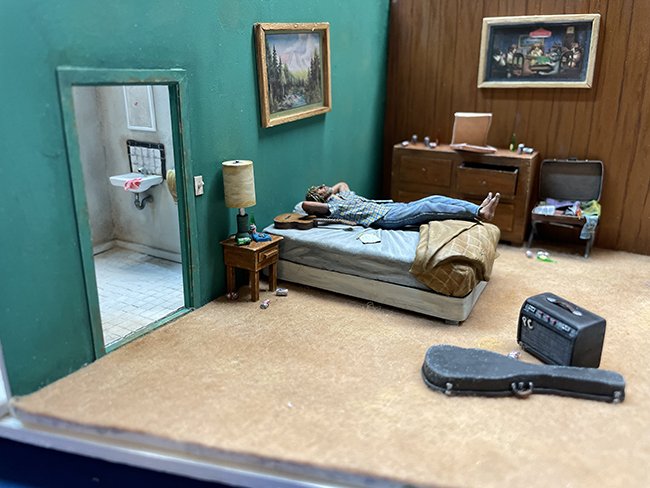
Motel Room with View of Bathroom – The motel room is complete with the remnants of a party and perhaps a garment left behind by the sink.
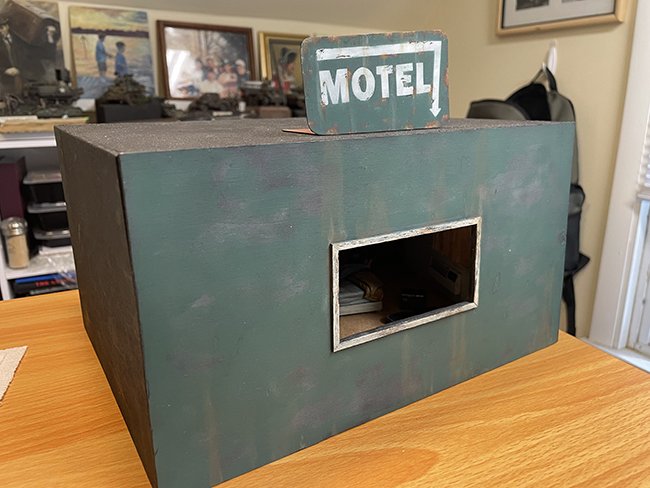
Box Exterior – It’s fun to decorate the outside of the box to fit the scene inside. Don’t get too carried away, though; the inside should still be more interesting!
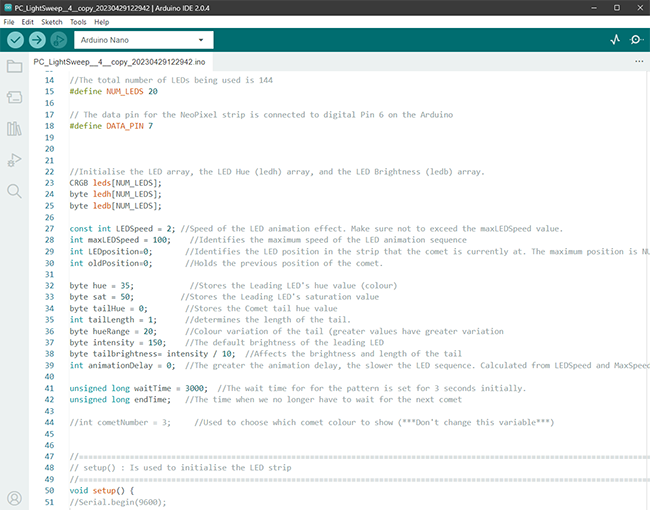
Arduino Code – No need to write code from scratch! Arduino has a vast library of effects and animations, many of which have descriptions for the function of each line. For instance, LEDSpeed = 2 enables you to change the speed of the animation just by changing the number.

A GIF of the Arduino at work.